October 5, 2019 • 3 min to read
Useful git commands with Sourcetree GUI
A list of git daily basis commands with Sourcetree GUI
git, sourcetree
Introduction
Remembering many git commands and also doing it in the terminal can be hard if you don't have too much practice. Graphical User Interfaces (GUI's) can make your life easier and improve your productivity. One of that is the Sourcetree.
Sourcetree is a free Git client for Windows and Mac that simplifies how you interact with your Git repositories so you can focus on coding. It enables you visualize and manage your repositories through a simple Git GUI.
In this post we will show how to run some git daily basis commands with the Sourcetree GUI.
Commmands
Log
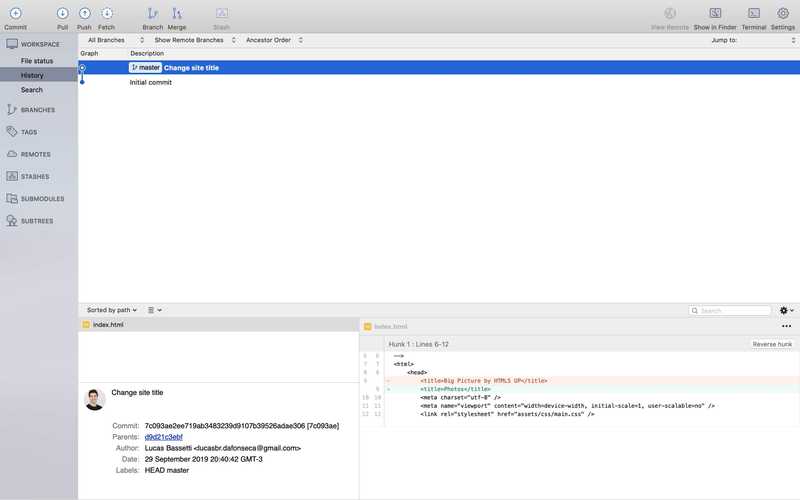
Shows the commit logs.
Command: git log (doc)
In Sourcetree we can check the log in the History tab.
Commit
Record changes to the repository
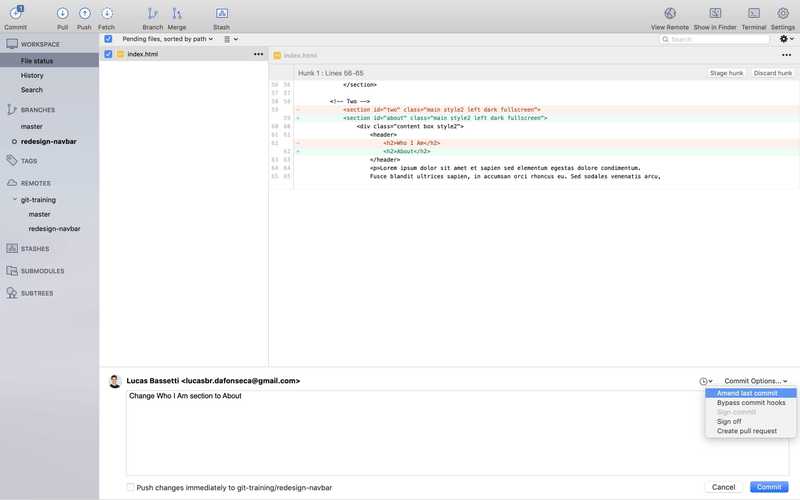
Command: git commit -m <message> [--amend] (doc)
In Sourcetree you can achieve the same result clicking in the rounded Commit button at the top left corner, write the message in the text box and commit it by clicking the right bottom button.

Adding the amend option you will replace the tip of the current branch by creating a new commit. For doing this in Sourcetree you need select the Commit Options in the right top of the commit input box and select the option Amend last commit.
Diff
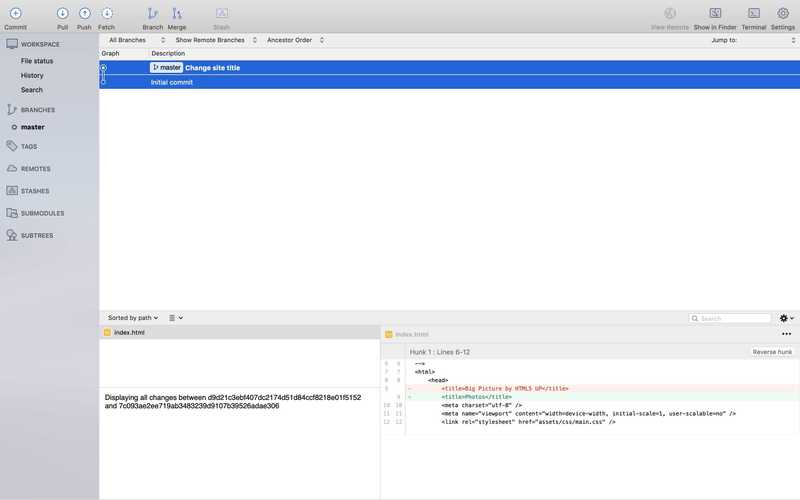
Show changes between commits, commit and working tree, etc
git diff <commit1> <commit2> (doc)
For doing the same in Sourcetree you just need select 2 commits in the History.
Stash
Use git stash when you want to record the current state of the working directory and the index, but want to go back to a clean working directory. The command saves your local modifications away and reverts the working directory to match the HEAD commit.
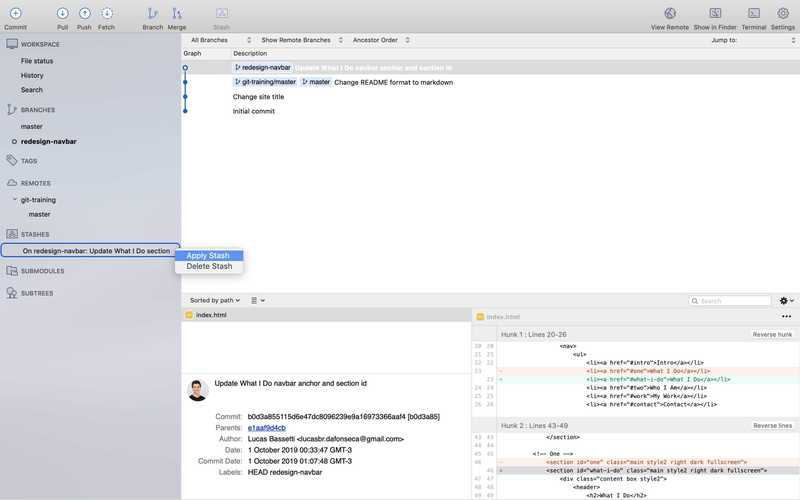
git stash push -m <message> (doc)
In Sourcetree for push a new stash you need select the Stash button in the top toolbar.

For apply or delete a stash you can use the Stashes menu in the sidebar.
Checkout
Switch branches or restore working tree files
git checkout -b <branch> (doc)
In Sourcetree first you need right click in the commit you want and select the Branch option.
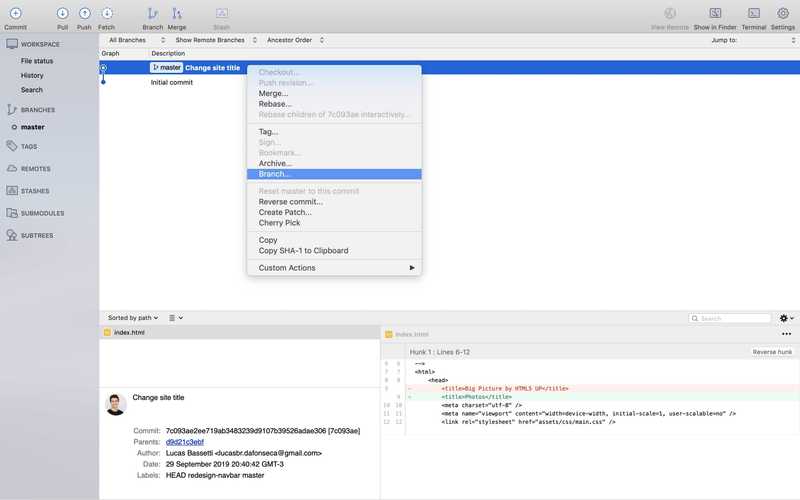
Then you just need add the branch name and confirm.

Add Remote
Adds a remote named <name> for the repository at <url>.
git remote add <name> <url> (doc)
For adding a remote you need first create a remote repository in some host service like Github or Bitbucket. For example, after create a repository on Github you have some like that:

To add this remote in Sourcetree first you need right click on the Workspace menu in the sidebar.
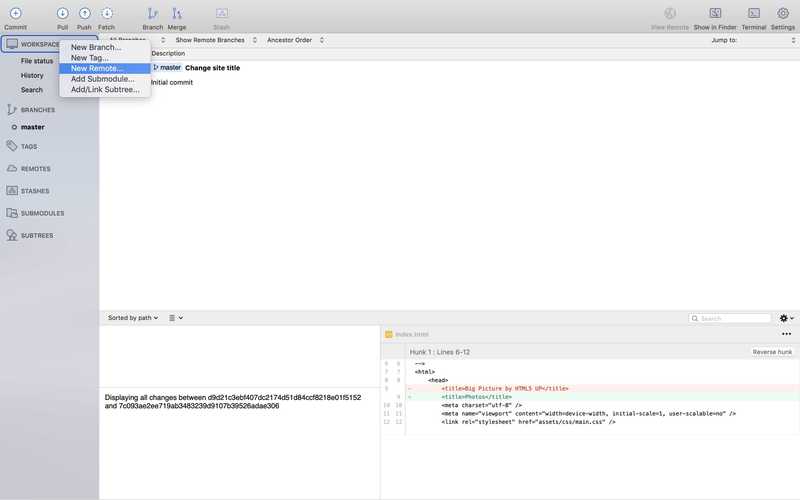
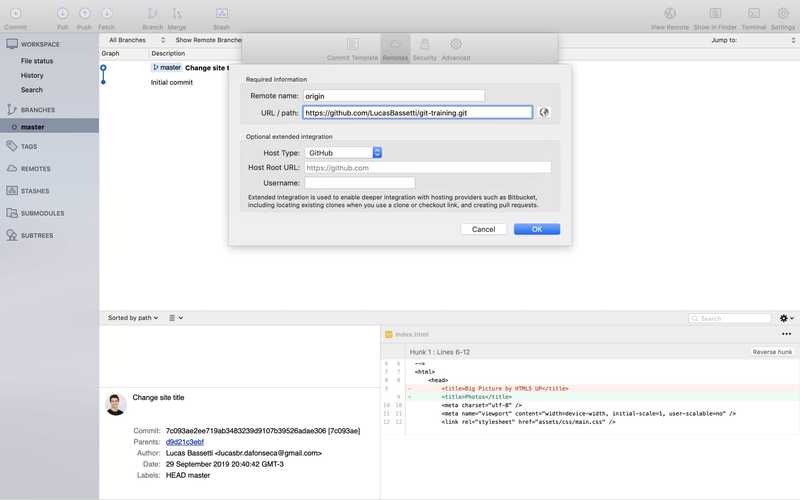
Then add the remote <name> (usually defined as "origin") and <url> in the fields and click in OK. That's it. Your new branch is ready.
Merge
Join two or more development histories together
git merge <branch> (doc)
For merge branch in Sourcetree you just need right click in the branch commit that you want and choose the option Merge.

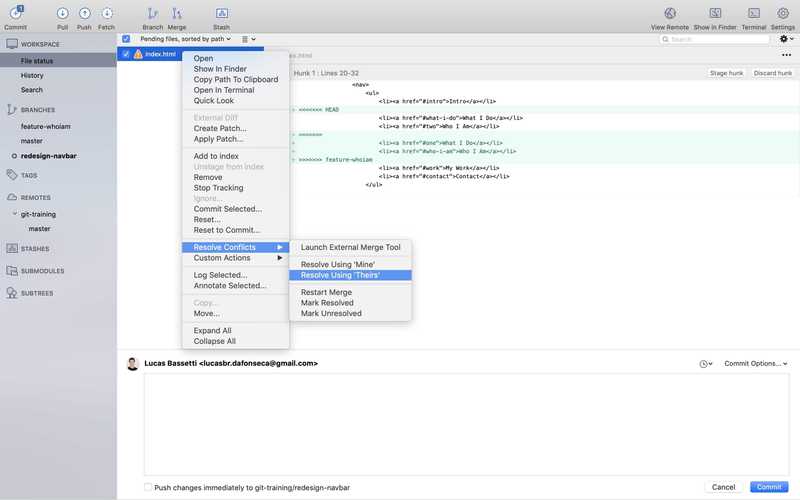
If you have some conflict you can also fix it by right clicking in the conflicted file, select the Resolve Conflicts and pick the desired option. Resolve Using 'Mine' means you want use the solution of your current branch and Resolve Using `Theirs' means you want replace the solution for the selected commit.
Squash
To Squash commits you should use rebase command in interactive mode. Rebasing interactively means that you have a chance to edit the commits which are rebased. You can reorder the commits, and you can remove them (weeding out bad or otherwise unwanted patches).
Start it with the last commit you want to retain as-is:
git rebase -i <after-this-commit> (doc)
An editor will be fired up with all the commits in your current branch (ignoring merge commits), which come after the given commit. You can reorder the commits in this list to your heart’s content, and you can remove them. The list looks more or less like this:
pick deadbee The oneline of this commit
pick fa1afe1 The oneline of the next commit
...
You can squash commits changing the word pick into squash (or just s) next to it. The result would be:
pick deadbee The oneline of this commit
squash fa1afe1 The oneline of the next commit
...
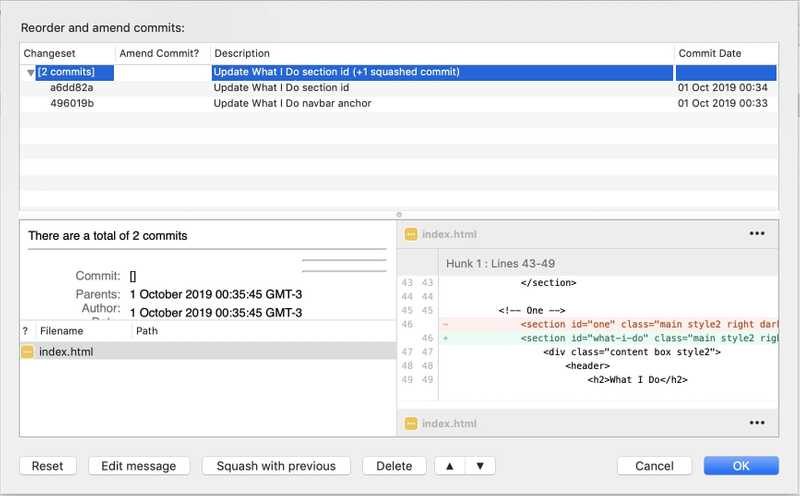
For squash commits in Sourcetree first you need right click in the commit before that you want and select the option Rebase children of <commit> interactively....

Then select the commits you want squash and confirm. You can also edit the commit message if you want.
Conclusion
In this post we learned some useful git daily commands (like commit, merge, stash, etc.) using the Sourcetree GUI. It enables you visualize and manage your repositories improving your productivity and making you focus on what matters: coding.
If you have some suggestion please let me know commenting below or submitting a PR for this post :).
Something Missing?
This project is open-source, so if something is missing or if you found some part confusing, please submit a pull-request in the Github repository for this post with your suggestions for improvement. It is a simple and effective way to contribute to the web development community.